Showing posts with label snack. Show all posts

Tuesday, April 27, 2010

TWD: Chockablock Cookies


Molasses, Oats, Cherries, Chocolate, Pecans, Coconut...Oh My!

Yes, folks, that is a lot of ingredients to pack into one little cookie. But let me tell you they are delicious.

Dorie's recipe uses a combination of both butter and shortening, I decided to take the lazy way out and just used all butter. She also gives a lot of room for creativity in this recipe. You can use any combination of nuts and dried fruit you would like. I opted for using dried cherries and pecans in additional to the oats, coconut and chocolate chips that were already part of the recipe. I loved the flavors together. They all complimented each other really well. The cookies were sticky in texture from the molasses and the the dough had a strong molasses flavor but in the end I didn't really notice a molasses flavor at all.

Thank you to Mary of Popsicles and Sandy Feet. You can find the recipe on her blog.

Tuesday, April 6, 2010

TWD: Dulce de Leche Duos


If you came looking for a Coconut Tea Cake; you unfortunately will not find one here. I had a minor mishap last week and am without an oven...Until Further Notice! What is a girl to do?? Don't the oven gods know I have baking to do! I am may be alone in this fact but once I am told I can't do something it only makes me want to do it more. I want to bake something in the worst way and not even because I am craving a sweet but just because I want to bake.

However, even though I am disappointed that I don't have an oven. I will not disappoint my fellow TWD bakers and readers. I have a few recipes that I made and for some reason or another never got around to posting. I will post those until I have a new oven or a new glass door or whatever it is that my landlords replace my mishap with.

These sweet cookies were our TWD recipe a couple weeks ago. I took the advice of several TWD bakers and made the dulce de leche in the crock pot method overnight. I was pleased with the results however, I think it could have cooked a bit longer. It didn't come out in a dark caramel color. It was a bit lighter and to me still tasted like sweetened condensed milk. I loved the cookies by themselves. I ate several before I wrapped them up and froze them in order to save my waistline! Adding the extra dulce de leche in the middle to make a sandwich is still gooey and sugary and yummy but I love a good plain cookie.

Our host was Jodie of Beansy Loves Cake and the recipe can be found here. For tips on making your own dulce de leche you can see our TWD discussion here and here.


PS. If your heart was set on a Coconut Tea Cake head over to see Carmen of Carmen Cooks for the recipe!

Tuesday, January 26, 2010

TWD: Chocolate Oatmeal Almost-Candy Bars

Dorie's

Okay, so I'm a week behind. I don't have this week's Cocoa-Nana Bread but if you are looking for the recipe, you can find here on Obsessed With Baking by Steph. I just didn't get it done this week and the brown bananas on my counter are the evidence of my lacking of timing.

It looks like I might have some more free time in my near future. I am not loosing my job but my work load seems to be getting considerably lighter. I suppose this is both a good and bad problem to have. Hopefully, I will be able to get a few more things posted here for the very few readers I have.

Now, back to the chocolate...

I was really excited to make this recipe because I make a very similar recipe of my own and its one of my all time favorite cookies. Whenever my mom made these, she took them to a party or an event of some kind, never leaving any at home of course. If she made them for the church bake sale, I would go and buy one just so I could eat one. Yes, they are THAT good.

Dorie's recipe did not disappoint. There aren't too many differences. Dorie puts nuts in her cookie base, I skipped this so I could have a better comparison. She also uses old-fashioned oats as opposed to quick oats. Dorie's were definitely chewier, my mom's are a bit more like a cookie. Dorie puts raisins in her chocolate filling. I have a problem with raisins and chocolate, unless they are Raisinets, I don't like the combo. I decided to put dried cherries in mine. I loved the added tartness in an otherwise very fudgey chocolate filling.


Mine

In the end, I don't have one that I like better. Both recipes are fantastic. You can find my recipe here on my blog. This week's host was Lillian of Confectiona's Realm and you can find Dorie's recipe on Lillian's blog.

Tuesdays With Dorie!

Tuesday, May 26, 2009

TWD: Chipster-Topped Brownies


FINALLY!!!

This was my week to pick our Dorie recipe!

I have to say I was very excited. The instant I received the email telling me my week was approaching, I grabbed the book and sat down with my husband. It didn't take us long to pick a recipe once we stumbled upon this brownie recipe. You see my husband has a weakness for chocolate chip cookies and an even bigger weakness for brownies.

I started getting a little nervous when the reviews from bakers who bake our recipes way in advance starting coming in about the cooking time being off and getting gooey middles. I took the advice of one baker who suggested baking the brownie layer for 15 minutes while mixing the cookie layer. It definitely helped to bake the brownie layer first. In the end, my total baking time was 60 minutes and an additional 15 for the brownie layer. I did placed some foil over the top for the last 15 minutes so my cookie layer didn't burn. I also didn't try to spread the cookie layer out, I just let it spread on its own while it baked.

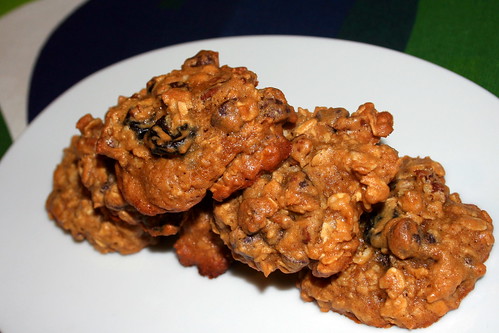
At first I was slightly disappointed because my chocolate chips seemed to sink into my brownie layer leaving me with a brownie with a golden colored top. My disappointment didn't last long once I tasted them. Amazing! I personally still would have preferred more of a cookie layer but these were still great!

Thanks to all who baked with me this week!


Chipster-Topped Brownies
Dorie Greenspan, Baking: From my Home to Yours

Ingredients

For the Brownie Layer:
6 ounces bittersweet chocolate, coarsely chopped
3 ounces unsweetened chocolate, coarsely chopped
2 sticks (8 ounces) unsalted butter, cut into chunks
1 2/3 cups sugar
4 large eggs
1/2 teaspoon salt
1/2 teaspoon pure vanilla extract
1 cup all-purpose flour
1 cup walnuts, coarsely chopped

For the Cookie Layer:
1 1/4 cups all-purpose flour
1/2 teaspoon baking soda
1/2 teaspoon salt
1 1/2 sticks (12 tablespoons) unsalted butter, at room temperature
3/4 cup (packed) light brown sugar
2/3 cup sugar
1 large egg
1 large egg yolk
1 teaspoon pure vanilla extract
6 ounces bittersweet chocolate, chopped into chips, or 1 cup store bought chocolate chip

Getting Ready
Center a rack in the oven and preheat the oven to 350 degrees F. Butter a 9x13 inch baking pan, line it with wax paper or parchment paper and butter the paper. Put the pan on a baking sheet.

To Make the Brownie Batter:
Put both chocolates and the butter in a bowl set over a saucepan of simmering water. Stirring occasionally, heat just until the ingredients are melted, shiny and smooth. If the mixture get too hot, the butter will separate from the chocolates. Remove the bowl from the heat.

Working with a stand mixer, preferably fitted with a paddle attachment, or with a hand mixer in a large bowl, beat the sugar and eggs on medium-high speed for about 2 minutes, until pale, thick and creamy. Beat in the salt and vanilla extract. Reduce the speed to low and mix in the melted chocolate and butter, mixing only until incorporated. Scrape down the sides of the bowl with a rubber spatula, then, still on low speed, add flour, mixing only until it disappears into the batter. Using the spatula, fold in the walnuts, and scrape the batter into the prepared pan. Set aside.

To Make the Cookie Dough:
Whisk together the flour, baking soda and salt.

Working with the stand mixer in the cleaned bowl or with the hand mixer in another large bowl, beat the butter and both sugars together on medium-high speed until smooth and creamy, about 3 minutes. One at a time, add the egg and the yolk, beating for 1 minutes after each addition. Beat in the vanilla. Reduce the mixer speed to low and add the dry ingredients, mixing only until they disappear into the dough. Still on low, mix in the chopped chocolate. Drop the cookie dough by spoonfuls over the brownie batter and, using a spatula and a light touch, spread it evenly over the batter.

Bake for 50-55 minutes, or until the cookie top is deep gold brown and firm and a thin knife inserted into the brownie layer comes out with only faint streaks of moist chocolate. Transfer the pan to a rack and cool to room temperature.

When the brownies are completely cook, carefully run a knife between the sides of the pan and the brownies, then invert them onto another rack, remove the paper and turn the right side up onto a cutting board. Cut into bars about 2 inches x 1 inch. (You can cut larger bars if you're serving cookie lovers with Texas-size appetites.)

Makes 24 servings.

Serving: Ice cream, whipped cream and creme fraiche are all great accompaniments, as is a generous drizzle of chocolate sauce.

Storing: Wrapped well or packed in an airtight container, the bars can be kept at room temperature for 2 days or frozen for up to 2 months.

Playing Around: The cookie top can be varied easily be swapping peanut butter, butterscotch or white chocolate chips for the chopped chocolate. You could even use all of them.

Wednesday, March 18, 2009

CEiMB: Nutty Granola


This is terribly long overdue but here it is anyway. An old Craving Ellie recipe from several weeks ago. I didn't make it at the time but really wanted to. In fact when it was my turn to chose a recipe, this is one of the recipes I considered.

I am finally getting this up because each time its been made and there have been several, my husband has eaten it all before I could get a picture. Granola is one of his favorites! Needless to say he has loved this recipe. It is so incredibly easy to make and very yummy!

Tuesday, August 19, 2008

TWD: Granola Grabbers


This week's edition of Tuesdays with Dorie is a good one! I am a big fan of cookies and oatmeal raisin are one of my favorites. My husband's favorite cereal is granola and he loves coconut so these were a big hit.

I made only a couple of slight changes. I used flax seed instead of wheat germ. I'm not really familiar with either so I didn't noticed any difference. Dorie suggests using granola without fruit because it is often too dry and therefore leaves the cookies dried out. My raisins seemed to be a bit dry on their own so I hydrated them in some warm water before adding them in. It worked great.

Thanks to Michelle of Bad Girl Baking for a great selection!

Tuesday, July 15, 2008

TWD: Chocolate Pudding


The bowl says "Somebunny needs a treat" and somebunny ate one! I did take a picture with the bowl full however, my pictures were just bad.

This week's recipe was selected by Melissa of It's Melissa's Kitchen. I was super excited to make this recipe for a couple of reasons.
1. My husband loves pudding.
2. I have never made pudding before and I've been wanting to make it from scratch (see #1).
3. I am in the process of moving and this looked easy.

Well, I can tell you that this is super easy. Having never made pudding before I wasn't sure how complicated the process was going to be. Dorie's instructions say to use a food processor however, I don't have one big enough. I used my Kitchen Aid stand mixer with the whisk attachment and it came out perfect.

The pudding was amazing. I will be making this again!

If you need a visual of the pudding, check out the blogroll at TWD. Thanks Melissa!


P.S. I won't be around for next week. This weekend is the big move and I don't anticipate my kitchen to be up and running by Tuesday. When I return, I will have pictures of my new kitchen, its bigger and better. I can't wait!!

Tuesday, July 1, 2008

TWD: Apple Cheddar Scones


I can't believe its July already and its another Tuesday. My summer has been a whirlwind of activity and it sure isn't going to calm down in the near future. I was super excited about this week's recipe. I have never made scones before but I love them so I was excited to try them on my own. The best things about TWD are learning new things, new techniques, new flavors, meeting new people and stepping outside of my comfort zone.

These scones came together very easily. Though the dough is super sticky, they are worth all the mess. The cornmeal was a little odd to me but it added another layer of texture that really worked great.


Since I had never made scones before I wanted to try a variety of flavors. Trying to stay within budget and use what was in my pantry I settled on milk chocolate chips and dried cherries. I loved the apple cheddar combination; sweet and salty is one of my favorites. I opted for fresh granny smith apples instead of dried apples and it worked perfectly. The chocolate scone and the cherry scone were also great but missing a little something. Next time I'll try the combo together or add another flavor to tie them in. The chocolate was a tiny bit dry. The cherry scone was also the same way but I didn't put enough cherries in either.


I will definitely be making these again. Thank you to Karina from The Floured Apron for this week's selection. And don't forget to visit the blogroll at Tuesdays with Dorie for more fabulous scones.

Tuesday, June 17, 2008

TWD: Peppermint Cream Puff Ring


To say that I was nervous about this week's recipe is an understatement. I was terrified! Pate a choux??? I couldn't even pronounce it. However, Caroline of A Consuming Passion chose this recipe with that very thought in mind. Trying something new.


Putting my best foot forward I started this week's recipe. I chose to make 1/4 of the recipe just in case I did manage to pull it off I didn't want dozens of cream puffs around for me to eat. I actually didn't have any trouble with the pastry. It cooked nicely. I followed other recommendations to let it cool a bit before adding the egg and that worked great. I piped out 7 little éclairs and a mini cream puff. I didn't think about the baking time before I put them in so I ended up cooking mine at 425 for 15 minutes and they were done. They did come out slightly lopsided though.


My vanilla pastry cream did not come together quite so easily. I am still not exactly sure what went wrong. I tempered the eggs, I'm pretty sure I brought it to a boil and cooked it a bit longer. It looked like a pastry cream at this point. Then, I let it cool for 5 minutes before adding the butter like Dorie says and that's when it turned into scrambled eggs. It didn't taste bad but the texture was not creamy at all. I think I must have overcooked the cream. I'm not one to be defeated so I will try this again but I ran out of time for this week.

I didn't use Dorie's chocolate glaze recipe. I was going to but tried to take a shortcut by putting it in the microwave and I burned it. I just melted some milk chocolate chips with a little milk and then dipped the éclairs in.

My husband enjoyed the éclairs and I'm glad I attempted this recipe. To see much more fabulous looking cream puffs and the original cream puff ring, please visit our TWD blogroll.

Saturday, June 14, 2008

MasterBaker: Vanilla


I realize that this post is way overdue and I don't really have an excuse. Well, I do but I'm sure you don't really want to hear them. However, since the roundup still isn't posted I figured I still had time. That and I really loved this recipe. And although it is posted very late, I did make this on time!

The master baker ingredient was vanilla and since I had never used real vanilla beans before I wanted to give it a try. I've heard rave reviews about vanilla beans. Someday I will become adventurous enough to make my own vanilla extract and vanilla sugar. Vanilla is one of my favorite flavors.


I decided to make vanilla bean angel food cake with a fruit salsa. I didn't have a very much success with the angel food cake. I have a mini-bundt cake pan with designs on the top. You can see in the picture above how well that turned out.


Since, I don't have a regular sized bundt pan, I put the remaining batter in my springform pan. It certainly didn't rise very much. It ended up being a dense little cake. I learned that angel food cake can only be made in a regular size bundt cake pan.

Despite the appearance, it tasted fantastic!! And the fruit salsa on top was amazing!!


Vanilla Bean Angel Food Cake
Source: Cooking Light

Ingredients
1 1/2 cups sugar, divided
1 (2-inch) piece vanilla bean, split lengthwise
1 cup sifted cake flour (about 4 ounces)
12 large egg whites
1/2 teaspoon cream of tartar
1/4 teaspoon salt
1 teaspoon lemon juice


Directions
Preheat oven to 325°.

Place 3/4 cup sugar in a small bowl. Scrape seeds from vanilla bean, and add seeds to sugar; discard bean. Work the vanilla seeds into sugar with fingers until well combined.

Lightly spoon flour into a dry measuring cup; level with a knife. Combine flour and sugar mixture, stirring with a whisk to combine.

Beat egg whites with a mixer at high speed until foamy. Add cream of tartar and salt; beat until soft peaks form. Add remaining 3/4 cup sugar, 2 tablespoons at a time, beating until stiff peaks form. Beat in juice. Sift flour mixture over egg white mixture, 1/4 cup at a time; fold in after each addition.

Spoon the batter into an ungreased 10-inch tube pan, spreading evenly. Break air pockets by cutting through batter with a knife. Bake at 325° for 50 minutes or until cake springs back when lightly touched. Invert pan; cool completely. Loosen cake from sides of pan using a narrow metal spatula. Invert cake onto plate.


Fruit Salsa
Source: Cooks Illustrated via All Things Mimi

Ingredients
2 T. apple jelly
2 T. light brown sugar
1/4 c. orange juice
1 jalapeño chile, seeded and minced
2 granny smith apples, cored, peeled and chopped fine
1 pint strawberries, hulled and chopped fine
3 kiwis peeled and chopped fine

Directions
Whisk jelly, brown sugar, orange juice and chile together in a large bowl. Add apples, strawberries and kiwi and toss to coat.


Thursday, June 12, 2008

TWD: La Palette's Strawberry Tart


Super apologies for my lateness!!! My excuses are as follows...

Thursday through Tuesday's temperatures exceeded 95 degrees in NYC.
Only the bedroom of my apartment has A/C (I actually put the tart dough into the pans in my bedroom using a TV tray)
Thus, you can conclude I am a dedicated TWD baker for turning on my oven in these conditions.


I had grand ideas for these little tarts! One day soon (I hope) I will execute my ideas. For now, I bring the original recipe with strawberry jam and strawberries (my favorite, so far) and black raspberry jam with raspberries (a little too sweet). I loved the tart (and so did my husband!) even though mine wasn't crumbly because the butter was melting as I was cutting it into the dry ingredients!


In conclusion, I am very happy I braved the heat to turn on my oven because these tarts were fabulous!

Thank you to Marie from A Year From Oak Cottage for hosting this week!
See other amazing tarts on the TWD blogroll.

Tuesday, June 3, 2008

TWD: French Chocolate Brownies


My husband's rehearsals are often where I send my baked goods so they don't stay in the house for us to eat. This week was perfect because they were having dinner together in between rehearsal and their show so I offered to bring dessert. I, of course, was running a bit late so the brownies were barely out of the oven before I had to leave. I figured I would just have to settle for cell phone pictures. My husband posed for me while eating a brownie. Check him out at the bottom. Luckily, the group is small so I was able to bring a couple home and got a good picture.

I really enjoyed making these brownies! I love the way the top crackled and the fruit...oh, it was just fabulous. I am not a drinker of any kind but on occasion I enjoy a good beverage. My favorite drink is an amaretto sour. What can I say, I like the sweet drinks. That said, the only alcohol in my pantry is amaretto. I paired that with dried cherries and lets just say that I should have doubled that part of the recipe for all the cherries I ate before I mixed them in! I didn't get a flame when I tried to ignite the cherries. I think I burned off the alcohol too quickly.

Thank you to Di of Di's Kitchen Notebook for a wonderful selection! Check out the TWD blogroll for more fabulous looking brownies!

French Chocolate Brownies

- makes 16 brownies -
Adapted from Baking From My Home to Yours.

Ingredients

1/2 cup all-purpose flour
1/8 teaspoon salt
1/8 teaspoon cinnamon (optional) I didn't chose this option
1/3 cup raisins, dark or golden I made my own option here and used dried cherries
1 1/2 tablespoons water
1 1/2 tablespoons dark rum There is no rum in my pantry but there was amaretto!
6 ounces bittersweet chocolate, finely chopped I used semi-sweet chocolate
1 1/2 sticks (12 tablespoons; 6 ounces) unsalted butter, at room temperature and cut into 12 pieces
3 large eggs, at room temperature
1 cup sugar

Getting ready: Center a rack in the oven and preheat the oven to 300°F. Line an 8-inch square baking pan with foil, butter the foil, place the pan on a baking sheet, and set aside.

Whisk together the flour, salt and cinnamon, if you're using it.

Put the raisins in a small saucepan with the water, bring to a boil over medium heat and cook until the water almost evaporates. Add the rum, let it warm for about 30 seconds, turn off the heat, stand back and ignite the rum. Allow the flames to die down, and set the raisins aside until needed.

Put the chocolate in a heatproof bowl and set the bowl over a saucepan of simmering water. Slowly and gently melt the chocolate, stirring occasionally. Remove the bowl from the saucepan and add the butter, stirring so that it melts. It's important that the chocolate and butter not get very hot. However, if the butter is not melting, you can put the bowl back over the still-hot water for a minute. If you've got a couple of little bits of unmelted butter, leave them—it's better to have a few bits than to overheat the whole. Set the chocolate aside for the moment.

Working with a stand mixer with the whisk attachment, or with a hand mixer in a large bowl, beat the eggs and sugar until they are thick and pale, about 2 minutes. Lower the mixer speed and pour in the chocolate-butter, mixing only until it is incorporated—you'll have a thick, creamy batter. Add the dry ingredients and mix at low speed for about 30 seconds—the dry ingredients won't be completely incorporated and that's fine. Finish folding in the dry ingredients by hand with a rubber spatula, then fold in the raisins along with any liquid remaining in the pan.

Scrape the batter into the pan and bake 50 to 60 minutes, or until the top is dry and crackled and a knife inserted into the center of the cake comes out clean. Transfer the pan to a rack and allow the brownies to cool to warm or room temperature.

Carefully lift the brownies out of the pan, using the foil edges as handles, and transfer to a cutting board. With a long-bladed knife, cut the brownies into 16 squares, each roughly 2 inches on a side, taking care not to cut through the foil.

Serving: The brownies are good just warm or at room temperature; they're even fine cold. I like these with a little something on top or alongside—good go-alongs are whipped crème fraiche or whipped cream, ice cream or chocolate sauce or even all three!

Storing: Wrapped well, these can be kept at room temperature for up to 3 days or frozen for up to 2 months.


Sunday, March 16, 2008

White Chip Chocolate Cookies

If you haven't figured it out already: I love cookies!! My mother tells me at the age of 2 I used to help her bake cookies. I would stand on a chair at the counter next to her. She would measure and I would get to "dump" it in the bowl. My favorite part was pouring in the chocolate chips! I still take pleasure in pouring a bag of chocolate chips into a bowl of dough.

My love of baking has expanded into a love of cooking since starting this blog. I am now finding my kitchen to be very therapeutic. Even doing the dishes is therapy for me. I love to be in my kitchen. The only problem is the products that come of my kitchen are NOT therapeutic!

I decided that if I wanted to bake so bad than I had to start finding places to send my baking so that I don't eat it myself! My mom would be disappointed with this recipe as she would say "White Chocolate is not REAL chocolate." Real chocolate or not, it still tastes fabulous!

I do not have a picture as it was late by the time I finished and I sent the cookies with my husband to his rehearsal the very next evening. The few cookies that stayed behind didn't last long enough to photograph.

White Chip Chocolate Cookies
(source: Nestle Toll House)

Ingredients
1 cup (2 sticks) butter, softened
3/4 cup white sugar
2/3 cup brown sugar
1 teaspoon vanilla
2 eggs
2 1/4 cup flour
2/3 cup baking cocoa (unsweetened)
1 teaspoon baking soda
1/4 salt
2 cups (12 ounces) white chocolate chips

Directions

Preheat the oven to 350

Combine flour, cocoa, baking soda and salt small bowl. Set aside. Beat butter, white sugar, brown sugar and vanilla in a large bowl until creamy. Add eggs, one at a time, beating well after each addition. Gradually beat in flour mixture. Stir in white chocolate chips.

Drop by well-rounded teaspoon onto ungreased baking sheets.

Bake for 9 to 11 minutes of until centers are set. Cooking on baking sheets for 2 minutes; remove to wire racks and cool completely.

Makes about 5 dozen cookies.

Monday, March 10, 2008

Oatmeal Chocolate Filled Cookies

So, I'm catching up on some blogging. I made these for my friend Hannah for our JKnottie January Baking Exchange. My MIL bought me a individual sized brownie pan for Christmas that I had been wanting to put to good use when Hannah told me she liked brownies and bar cookies! Perfect.

I had also been wanting to make my favorite bar cookie. My mom would only ever make these to take some where. And rarely would she leave a couple at home for me and my siblings. I have even been known to go buy them when she took them to bake sales!

I loved the new pan and as stated these cookies are one of my favorites. However, the cookie is done in layers so it was a tedious process to put it together. Next time I experiment with the new pan, I think I'll find a pour-able type recipe!


Oatmeal Chocolate Filled Cookies
Source: Iris Cote-Brier Hill Fireman's Auxiliary Country Cookbook
Photos: my kitchen

Ingredients

Dough:
1 cup butter
2 cup brown sugar
2 eggs
2 teaspoon vanilla
2 1/2 cup flour
1 teaspoon baking soda
1 teaspoon salt
3 cup quick cooking oats

Filling:
1-12 oz package chocolate chips
15 oz can sweetened condensed milk
2 tablespoon butter
1 teaspoon vanilla
1 cup chopped nuts (any variety-optional)
2 teaspoon vanilla


Directions

Cream butter and sugar until light and fluffy. Mix in eggs and vanilla. Sift together the flour, baking soda and salt. Stir in oatmeal. Ass dry ingredients to creamed mixture. Set aside to make filling.

Mix chocolate chips, sweetened condensed milk, butter and salt together in top of double boiler and melt. When smooth, add nuts and vanilla.

Spread 2/3 oatmeal mixture in bottom of 15 1/2 x 10 1/2 inch pan (jelly roll pan). Cover with chocolate mixture. Scatter pieces of remaining dough over the chocolate.

Bake at 350 for 25-30 minutes. Let cool completely before cutting.


Banana Crumb Muffins


I realize this post is late but I'm posting it anyway. I had some leftover bananas and a new king size muffin pan and needed to find a recipe for the Master Baker challenge, hosted by my friend Nikki. I found a recipe for Banana Crumb muffins at Katie's Kitchen that sounded perfect.

I was so excited to use my new pan that I miss read the ingredients and directions. They turned out fabulous (or fierce, as some might say!). I did not end up with a crumb topping, much to my dismay. I have a few more frozen bananas so I plan to try making them again the right way. The original recipe can be found here.

Basically, when I read " add sugar" in the instructions, I took that to mean both kind of "sugars" listed. So, I add the brown sugar to the batter instead of waiting to use it in the crumb topping. Of course, I realized my mistake a moment too late (ie. after it was mixed in!). For fear that they would to sweet enough with the extra sugar, I didn't bother to add the crumb topping.

In the end the muffins were amazing and not too sweet at all. I sent 2 muffins to the host of Master Baker (I was already sending her a package but yes, I was also trying to score bonus points!). My husband and split one when they came out of the oven and then he proceeded to eat the other 3! I guess I really do have to make more.


Banana Crumb Muffins
(adapted from: allrecipes.com)
Photos: my kitchen!

Ingredients

1 1/2 cup flour
1 teaspoon baking soda
1 teaspoon baking powder
1/2 teaspoon salt
3 bananas, mashed
3/4 cup white sugar
1/3 cup brown sugar
1 egg, lightly beaten
1/2 cup butter, melted

Directions

Preheat, oven to 375. Lightly grease12 muffin cups (or 6 king sized muffin cups), or line with muffin papers.

In large bowl, mix together first 4 ingredients.

In another bowl, beat together remaining ingredients.

Stir the banana mixture into the flour mixture until just moistened. Over mixing will produce tougher muffins.

Spoon batter into muffin cups. Bake in preheated oven for 18-20 or until toothpick comes out clean. My king size muffins took about 32 minutes.

Serve warm with butter!


Monday, February 25, 2008

January SBGEX

So, now that February's gadgets are here, I realized that I never posted January's. I know she's been scolding me about my updates so here's to Clara and her awesome cupcakes! Thanks friend :)
My favorite Girl Scout cookies are the Tagalongs so she made me Peanut Butter and Chocolate Cupcakes!
She did send 4 but we couldn't waste anytime taking pictures. We had to taste test them first, pictures come later.
The verdict by both Jake and I: A+

Thanks Clara! (Sorry for the delay!)

February SBGEX


This month instead of exchanging baked goods we decided to exchange kitchen gadgets! It was fun. Jennifer was my gadget giver and she did an awesome job!
She sent me oodles of fun gadgets!:
a silicone muffin/cupcake pan-though I've been told this bake ware is not wonderful, I've really been wanting to try it
a rubber spatula-you can never have to many of these
silicone baking mats-I've really been wanting to try these, my mom loves hers
egg slicer-one of those handy gadgets I just didn't own (and I've been craving egg salad)
and a bonus! Peanut Butter Chocolate Chip Cookies! :)

Thanks Jennifer!

Saturday, February 2, 2008

Raspberry Tarts (Guilt Free!)


I was in great need of something to satisfy my sweet tooth. The problem was that all sweets were banned from our home for the month of January in an attempt to get rid of unwanted holiday pounds.
Then, I came across my friend Nina's blog. I immediately added the ingredients to my grocery list for the week.

Ingredients
1 Reduced Fat Graham Cracker Crust (I bought the individual sized tarts)
1 Box of Sugar Free Gelatin - I used raspberry
1/4 cup of boiling water
2 6 oz. containers of light yogurt - I used raspberry
1 tub of fat free cool whip

Directions
Dissolve Jello in boiling water. Stir in yogurt with wire whisk. Fold in cool whip. Pour into pie crust. Refrigerate at least 2 hours - overnight preferably.
You can also make this with cherry Jello and cherry yogurt or lime Jello and key lime yogurt- any combination like that will work.


Recipe from Weight Watchers and Love-Sweet-Love
Photo: my kitchen

Husband Rating: A+, He could have eaten all the tarts in one sitting.
Wife Rating: A+, I love them as well and didn't feel guilty for having something sweet!

Tuesday, January 1, 2008

Cranberry Pistachio Biscotti

This is part 2 of the return blog (i.e. Christmas cookies) I was so excited about this recipe. I went looking for a biscotti recipe and came across this on the Betty Crocker website. The reviews were great so I decided to give it a try. They turned out fabulous and I thought I stumbled upon a really great cookie recipe for Christmas. Well, I did stumble upon a great recipe I just wasn't the first!
The recipe uses the Betty Crocker sugar cookie mix that is already prepackaged. It made making these super simple but a little on the sweet side. I might try another recipe next time so that I can cut the sugar and taste more of the pistachio.
My favorite part about making these was the green dough!


Ingredients:
1 pouch Betty Crocker sugar cookie mix
1 box pistachio instant pudding (4 serving size)
1/4 flour
1/2 butter, melted
2 eggs
1/2 cup pistachios, finely chopped
1/2 cup dried cranberries
2 tablespoons powdered sugar


Directions
Heat oven to 375°F. In large bowl, stir together cookie mix, pudding mix and flour. Stir in melted butter and eggs until soft dough forms. Stir in pistachios and cranberries. Divide dough in half. On each of 2 ungreased cookie sheets, shape half of dough into 15x2-inch log.
Bake 18 to 20 minutes or until golden brown. Cool on cookie sheets 20 minutes. Reduce oven temperature to 250°F. Place logs on cutting board. Cut crosswise into 3/4-inch slices. Place slices cut sides down on ungreased cookie sheets.
Bake 40 minutes, turning once. Immediately remove from cookie sheets to cooling racks. Cool 10 minutes. With small, fine strainer, lightly sprinkle powdered sugar over tops of cookies. Store loosely covered.
Makes approx 40 cookies


Recipe from Betty Crocker
Photos from my kitchen

The Return Blog!

As many bloggers, I have to apologize for my absence. It all started when I got sick a week and a half before Christmas (and a few days before my birthday!) I was so sick it was awful. However, I was still determined to make Christmas cookies. I had an obligation to my secret baker. My amazing husband stepped up to the plate. He not only did the normal chores of cooking, cleaning and dishes. He even wrapped Christmas presents and helped me bake Christmas cookies. I have to give him more credit than myself as I did one cookie and then scooped the rest onto the pans from my seat on the couch!

Baking is such a huge tradition for most at Christmas time and this being our first Christmas together and married in our apartment, I wanted something special. I decided on two of my favorite Oatmeal Peanut Butter Chocolate Chip Cookies and Cream Cheese Snowballs (or Snow People). I drooled over a cookie I saw on Clara's blog awhile ago and had even bought the ingredients at the time and never made them. So, I added Cranberry White Chocolate Chip Oatmeal Cookies to the list. My dilemma was that the girl I was baking for doesn't really like chocolate and so far I only had one cookie without chocolate. I went looking and came up with Cranberry Pistachio Biscotti.

Without further a due...my Christmas cookies 2007!

Oatmeal Peanut Butter Chocolate Chip Cookies
I have already posted these cookies on my blog but I wanted to show them again. You can substitute M&M for the chocolate chips to make them festive! I baked one pan before adding the m&m for my secret baker who didn't like chocolate,


Cranberry White Chocolate Chip Oatmeal Cookies
I loved these cookies! I origonally found them on Clara's blog (also found here and here). When I went back to find the source for the cookies, I was led on a wild goose chase. I didn't end up finding the original as the last blog poster doesn't remember the source. So, if you are the original source, please let me know so I can give proper credit!
For some reason, mine didn't come out quite right. I didn't actually make these so I can't confirm the accuracy of the process (he is a wonderful cook though!). We mixed them up and ended up putting the dough in the fridge to bake the next day. The next day the dough came to a full room temp before baking and when we went to scoop them, the dough was very dry. We ended up shaping them into balls by hand and flattening into cookies. They tasted amazing! I'm just not quite sure what went wrong. I will be trying them again in the future!


Cream Cheese Snowballs (or Snow People!)
This cookie became a new favorite when Jake and I started dating. His mom introduced me to this cookie and well what can I say...Mom2 is fabulous! Other than my MIL I don't have a source for this cookie. The card says the Meredith Corp and the picture came from Tupperware. So I give credit to my mother-in-law
The recipe is written to make snow people, however, they are very time consuming so we shortened them to snowballs and just have little bite-size cookies!
These cookies are also amazing and the cutest of the snow people is worth it in the end!


Ingredients
1/2 cup margarine or butter, softened
6 oz cream cheese, coftened
2 1/3 cup flour
1 1/4 cup sugar
1/2 teaspoon baking powder
1 egg
1/2 teaspoon vanilla
1/4 teaspoon almond extract (I omitted this year as it is not yet in my pantry)
sprinkles
miniature chocolate pieces
red cinnamon candy
decorator icing
peanut butter cups

Directions
In a large mixing bowl beat butter and cream cheese. Beat in flour, sugar, baking powder, egg, vanilla and almond extract till combined.

For Snow Balls
Using a small cookie scoop; scoop dough onto an ungreased cookie sheet. Bake at 325 for 15-18 minutes for until edges are firm and bottoms are slightly brown.

For Snow People:
For each snow person, shape dough into a 1' person, 3/4' person and a 1/2' person. Place balls on an ungreased cookie sheet in decreasing sizes with sides pressing; press together slightly. Decorate with sprinkles, chocolate pieces and cinnamon candy. Bake at 325 for 15-18 minutes for until edges are firm and bottoms are slightly brown. Cool 1 minute on cookie sheet. Add peanut butter cup for hat allowing to melt slightly to create the snowman's hat. (We transferred to pan to the freezer to cool the cookies quickly so the hats didn't melt too much) Decorate with decorator icing to make scarf.